Wednesday, December 21, 2016

Invalid Request during running.


This is happening because of session expired. Just try this command via the terminal
  • appc logout 
  • appc login
Then run your app again. Hope this helps.

sqlite database store.

You will get it from the DDMS

DDMS-->Window-->Show view-->file explorer-->data--> data--> app package name-->databases 

Or Go to the tools folder of your Android SDK then click on "monitor"
Android Device Monitor> file explorer-->data--> data--> app package name-->databases
Hope this helps.

Install Appcelerator Studio to the Mac.


At first, download this node version and install it in your machine.


Then install the CLI via the terminal

sudo npm install -g appcelerator
appc use latest
appc setup
appc login 

Now take a fresh copy of Appcelerator Studio and install it in your machine. It will automatically install all other prerequisite software.


  •  https://web.appcelerator.com/product/studio

Hope this helps.

Appc command not found.

To the windows PC you can see that problem if the npm prefix is not on the PATH. Try running echo %PATH% and it should contain something similar to C:\Users\Ewan\AppData\Roaming\npm

 Try to set the path first then run the command

 SET PATH=C:\Windows\system32;%PATH%

      npm install -g appcelerator
      appc use latest
      appc setup


For the Mac

Run the command "npm config get prefix" and/or "npm get prefix" and make sure this refers to the default value /usr/local.

If it does not refer to the default value then run this command     

    npm config set prefix /usr/local

After Then run the following  command and let me know
      sudo npm install -g appcelerator
      appc use latest
      appc logout -D
      appc login 
      appc setup

Hope this helps.

How to change the android buildtools version in Appcelerator


You can change the build tools version using this command

appc ti config android.buildTools.selectedVersion ##.##.##

Example
appc ti config android.buildTools.selectedVersion 25.0.3

Just go to your Android SDK location. Here you will see the version number.

For mac location
/users/fokkezb/Library/Android/sdk/build-tools/ version_number

Hope this helps.

Saturday, December 17, 2016

Installing x86 Emulator Packages.


Maximum versions of the Android API are available with Intel x86 emulators. Look for the "Intel x86 Atom System Image" in the Android SDK Manager.
Go to the android SDK >>tools >> click on android and select all tools, Android-6, and Extra folder(Intel x86 emulator accelerator (HAXM)) then install those packages.
The x86 emulator may run faster than the standard ARM emulator, but may show minor differences with the ARM emulator. Extra software is required to take advantage of the x86 emulator – see Configuring Virtual Machine Acceleration in the Android Tools documentation. And the Extra software is Intel x86 emulator accelerator (HAXM).

Friday, December 16, 2016

Create new Android emulator.

Android default emulator is really very slow so create new x86 CPU based emulator

Go to
Preference >> Studio >> Android >> Click on Manage AVDs
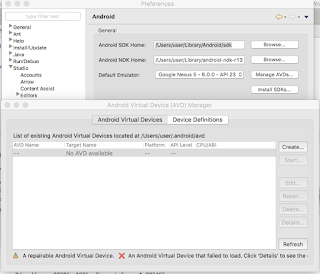


Android Virtual Device(AVD) Manager will be opened

Here click on >> Create
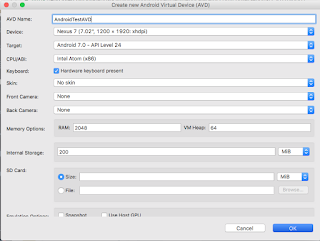


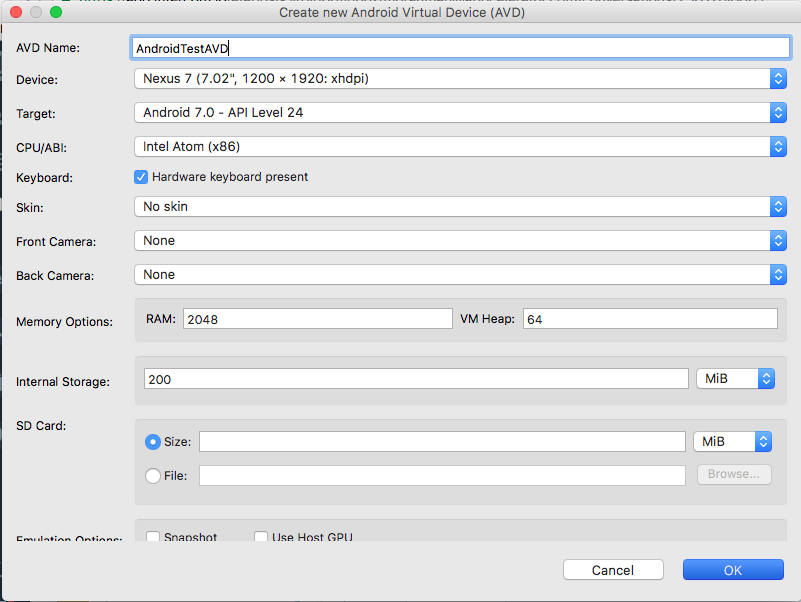
A new window will be opened then fill the following fields

AVD Name: Give Any Name
Device: select any device

Target: Select the target android API

CPU/API(very important ): select  (Intel Atom x86)

Note: If you do not find (Intel Atom x86) CPU then you have to download "Intel x86 Atom System Image" for your Android SDK. Also, you have to download the “Intel x86 emulator accelerator (HAXM)” from the Extra folder. Then you have to install it. To do so, go to your Android SDK’s installation folder, then go to extras/intel/Hardware_Accelerated_Execution_Manager/ and execute IntelHAXM.dmg. 
See this link how to install the packages
- http://titaniumsolution.blogspot.com/2016/12/installing-x86-emulator-packages.html

Keyboard: if you need Hardware keyboard then check otherwise uncheck.

Skin: No Skin

Then Click on OK button.


Now you will see the emulator on the Android Virtual Device(AVD) Manager

Click on start to start it.
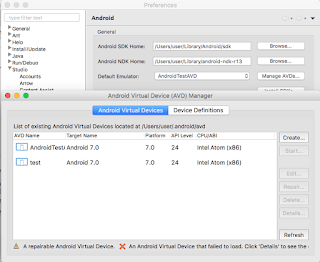


If you face any issue then you have to fix it otherwise it will not work.

Now run your App. Always try to start your emulator from Android Virtual Device(AVD) Manager then run App.

Localization supports for the plist file.

Suppose we are going to support for the japanese language and the camera permission. Here is the sample example.
//tiapp.xml
<ti:app>
<ios>
<plist>
<dict>
<key>NSCameraUsageDescription</key>
                   <string>Can we use your camera?</string>
</dict>
</plist>
</ios>
</ti:app>
//i18n/ja/app.xml
<?xml version="1.0" encoding="UTF-8"?>
<resources>
<string name="NSCameraUsageDescription">あなたのカメラは使えますか?</string>
</resources>

Now if you change your device language to the japanese language then you will see the effect.
Hope this helps.

Fresh installation Appcelerator Studio to the windows PC.

If you download the Appcelerator Studio and try to install, it will cover all the steps automatically, but sometimes it creates problem to install. So it's better to install all other prerequisites first then install Appcelerator Studio.


If you face any issue after installation then uninstall the Studio, node.js, and all JDK, JRE version from your system then follow the following steps to install Appcelerator Studio to the Window PC.

Prerequisite and Steps
1. Install JDK8, 
2. Download compatible nodeJS version and install it
3.Then run the following command via the command prompt
- npm install -g appcelerator
- appc use latest
- appc config set proxyServer null
- appc setup
4. Finally, download the latest version of Axway Appcelerator Studio and install it on your machine. It will automatically install all other prerequisites.

Now open the Axway Appcelerator Studio.

Hope this helps.

Thursday, December 15, 2016

For the iOS 10 or later version, permission issue.

For the iOS 10 or later version, you have to add the following keys in the plist of your tiapp.xml file, if you use any one.


  • NSContactsUsageDescription: If you use the Ti.Contacts API to access contacts from the address book
  • NSCameraUsageDescription: If you use the Ti.Media.showCamera API to capture photos and videos
  •  NSCalendarsUsageDescription: If you use the Ti.Calendar API to access device calendars
  •  NSPhotoLibraryUsageDescription: If you use the Ti.Media.openPhotoGallery API to access the photo gallery or Ti.Media.showCamera API to save photos
  •  NSMicrophoneUsageDescription: If you use the Ti.Media.AudioRecorder API to record audio or Ti.Media.showCamera to record videos


<ios>
    <plist>
        <dict>
            <key>NSContactsUsageDescription</key>
            <string>Can we use to your contacts?</string>
            <key>NSCameraUsageDescription</key>
            <string>Can we use your camera?</string>
            <key>NSCalendarsUsageDescription</key>
            <string>Can we use your calendar?</string>
            <key>NSPhotoLibraryUsageDescription</key>
            <string>Can we save to your library?</string>
            <key>NSMicrophoneUsageDescription</key>
            <string>Can we use your microphone?</string>
        </dict>
    </plist>
</ios>


Thanks